Oracle Enterprise Manager Cloud Control 12c has been built around 10 major themes. Some of the key aspects of each theme are:
• Enterprise-Ready Framework: Plug-in-based management of targets, user interface redesign, named credentials
• Cloud Management: OVM server and server pool management, cloud topology viewer
• Chargeback and Capacity Planning: Charge back based on selected target types, reporting on usage and trends
• Exadata and Exalogic Management: InfiniBand monitoring, real-time and historical system views
• Configuration Management: Configuration tracking, comparisons, compliance checking
• Provisioning and Patching: Separation of provisioning design and execution, selfupdate, mass database patching
• Application Quality Management: Application replay, real application testing, data masking
• Database Management: Database creation and upgrade via Cloud Control
• Middleware Management: Improved discovery, monitoring, provisioning, diagnostics
• Applications Management: Fusion Applications management improvements
Step by Step Installing EM 12c Cloud Control in a Single-Server Topology
Before starting the EM 12c installation, create a database as a repository.
Preconfigured management repositories are offered by Oracle in the form of database templates and are available for download from the Oracle Technology Network (OTN).
# unzip 11.2.0.3_Database_Template_for_EM12_1_0_4_Linux_x64.zip –d $ORACLE_HOME/assistants/dbca/templates
Start DBCA.
# dbca
Select “Create a Database” and click Next.
Select the “11.2.0.3 Database Template for EM12.1.0.4 Small Deployment” template and click Next.
Enter the following values,
Global Database Name = em12rep.example.com
SID = em12rep
Uncheck the option to “Configure Enterprise Manager”. Deselecting this option will prevent the Database Control (part of the 11g database distribution) from being configured.
When complete, you will see the Database creation complete page. Click Exit.
Database and Listener should be up and running to start with the below 12c EM Cloud Control installation.
Typically, hardware and software requirements are checked ahead of time based on the installation documentation. Before starting the installation, it is recommended that you run the installer prerequisite check to verify the host’s suitability for this installation. Run the runInstaller utility with the following parameters to give yourself an opportunity to fix any parameters that may need to be adjusted. In your environment, all parameters have been set to the required values, and the output will reflect that fact.
# cd /emstage/emcc12104/
# ./runInstaller -executeSysPrereqs
Starting Oracle Universal Installer...
Checking Temp space: must be greater than 400 MB. Actual 4593 MB Passed
Checking swap space: must be greater than 150 MB. Actual 8306 MB Passed
Checking monitor: must be configured to display at least 256 colors. Actual 16777216 Passed
Exiting Oracle Universal Installer, log for this session can be
found at /u01/app/oraInventory/logs/installActions25_Oct_2015.log
Note: DO NOT run the EM Prerequisite Kit (emprereqkit) on an installation with a preconfigured database.
At this point you may download any additional plug-ins required for your system but not included in the default distribution. If additional plug-ins were needed, then check the following location for more plug-ins:
http://www.oracle.com/technetwork/oem/extensions/index.html
Then you would run the installer:
# runInstaller -pluginLocation <absolute_path_to_plugin_software_location>
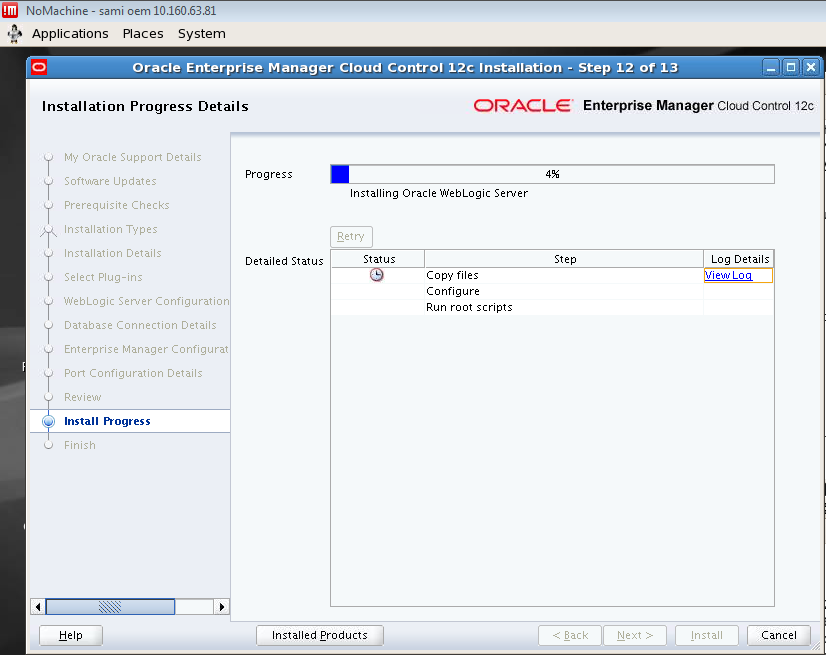
# ./runInstaller


As root user from another terminal execute allroot.sh script.
# ./u01/app/oracle/product/middleware/oms/allroot.sh

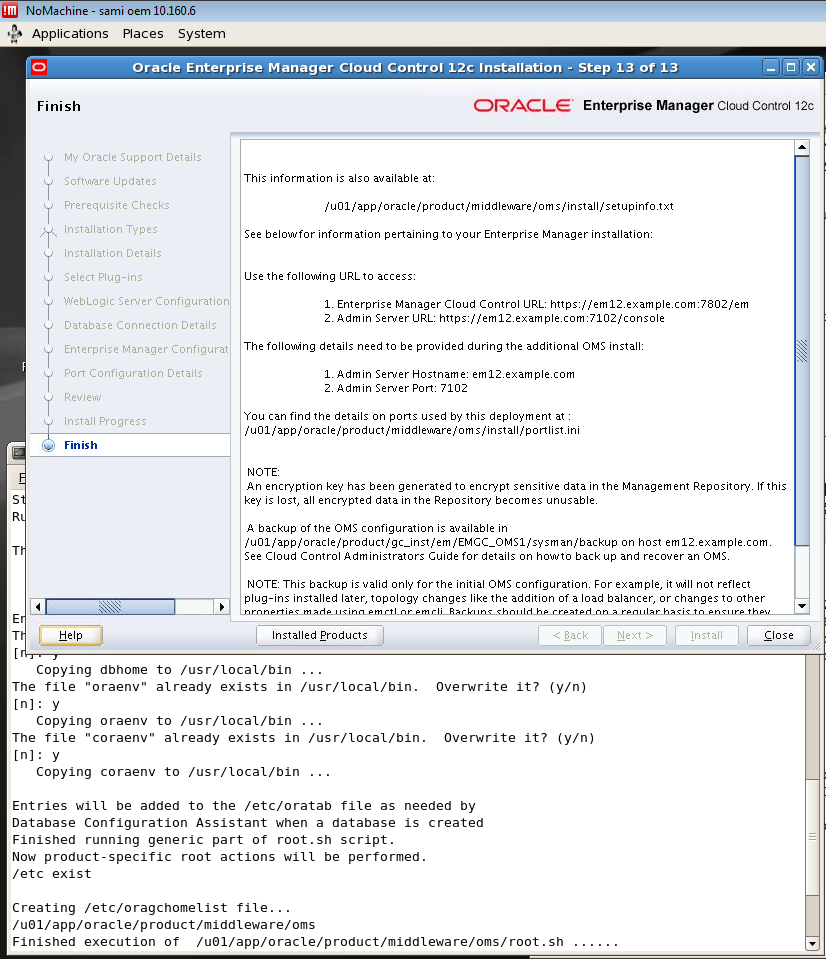
On the Finish page, take note of the Cloud Control URL:
Enterprise Manager Cloud Control URL: https://em12.example.com:7802/em
Admin Server URL: https://em12.example.com:7102/console
Click Close to close the installer
Now log in to Cloud Control Console as the SYSMAN user.
To View all the targets managed by Enterprise Manager Cloud Control 12c installation.
Navigate to Targets > All Targets
Navigate to Setup > Extensibility > Self Update
To check updates on Cloud Control components such as plug-ins and new agents. By default, the
connection mode is Online and you would be able to Check Updates on a regular basis. If you select the Offline connection mode, you must perform separate metadata downloads to a known location, transfer these files to the OMS host, and then upload them to your system.
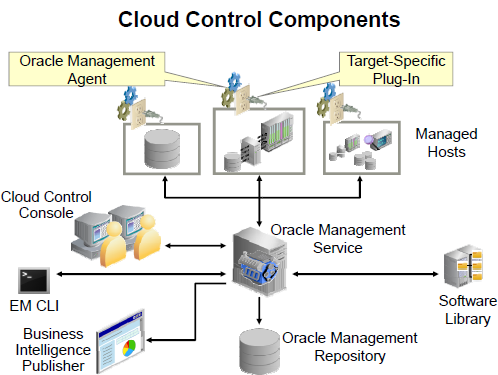
Enterprise Manager startup sequence:
1. OMR Oracle Management Repository listener and database instance
2. OMS Oracle Management Service
3. Agent on OMS server
Enterprise Manager shutdown sequence, is in the reverse order.
1. Agent on OMS Server
2. OMS
3. OMR Listener and database instance
Start, stop, and check the status of the OMS with emctl
$ORACLE_HOME/bin/emctl start oms
$ORACLE_HOME/bin/emctl stop oms [-all][-force]
$ORACLE_HOME/bin/emctl status oms [-details]
Start, stop, and check the status of an agent with emctl
$AGENT_INST_HOME/bin/emctl start|stop|status agent
OMS Oracle Management Service Log Files
Log files for the OMS are primarily in the following locations:
gc_inst/em/EMGC_OMS1/sysman/log
gc_inst/user_projects/domains/GCDomain/servers/EMGC_OMS1/sysman/log
gc_inst/user_projects/domains/GCDomain/servers/EMGC_OMS1/logs
Agent Log Files
Log files for the central agent (the agent installed on the OMS server) are in this location:
<agent_base_directory>/agent_inst/sysman/log
I hope this article helps you to understand the steps involved in installing Oracle EM 12c Cloud Control.
Please subscribe to this blog and for any further queries please don't hesitate to contact me on samiappsdba@gmail.com